

Installing solar panels is no longer a luxury, it’s becoming a necessity for Indian homeowners and businesses looking to reduce electricity bills by 30-50% and achieve energy independence.
As electricity costs in India continue to rise (with average tariff increases of 4-7% annually), more homeowners in Delhi, Mumbai, Bangalore, and across the country are investing in solar panel installations. With government subsidies like PM Surya Ghar providing up to 60% cost subsidy and payback periods of 4-6 years, now is the perfect time to go solar.
This comprehensive step-by-step guide will walk you through the entire solar panel installation process from determining your power needs (1kW to 10kW+ systems), roof assessment, component selection, electrical wiring, inverter setup, to final commissioning and maintenance. Whether you’re installing a 3kW home system or planning a 5kW setup, this guide covers everything you need to know about how to install solar panels on your roof safely, efficiently, and cost-effectively.
Why Choose Solar Energy In 2026?
The more we switch to solar energy, the less we depend on fossil fuels like coal and petroleum. Solar system installation allows you to tap into the various benefits of solar energy, such as:
Environmental benefits
The sun is a source of renewable energy. It reduces carbon emissions in the environment. It reduces the emission of greenhouse gases, which are the major contributors to climate change. Every kilowatt-hour of solar energy produced in India translates to one less kWh generated using fossil fuels. This means avoiding around 0.86 tons of CO₂ per MWh emitted by coal-based plants.
Economic benefits
Switching to solar energy reduces your dependency on conventional power and helps you save on your electricity bill. After solar panel installation, it requires little to no maintenance. You can enjoy the benefits of various government subsidies. This improves the overall Return on Investment (ROI) and helps save money in the long run. Consumers switching to solar energy through rooftop systems installation have seen a 20–30% reduction in electricity bills.
Energy independence
Solar energy increases energy independence by reducing dependency on coal and petroleum. India depends on imports for its energy needs. By switching to solar, we can reduce our import dependency and strengthen energy security.
What is a Solar PV system?
A solar Photovoltaic (PV) system uses the sun’s energy to generate electricity. It is commonly known as a solar panel.
It contains an array of PV cells that absorb sunlight and convert it into electricity. Electrons are knocked out as sunlight falls on the solar cells, generating a small electric current through the photovoltaic effect. The electricity produced from the solar panels is DC, which is converted into AC using an inverter. This current is used to power electrical appliances locally or sent to the grid for use elsewhere.
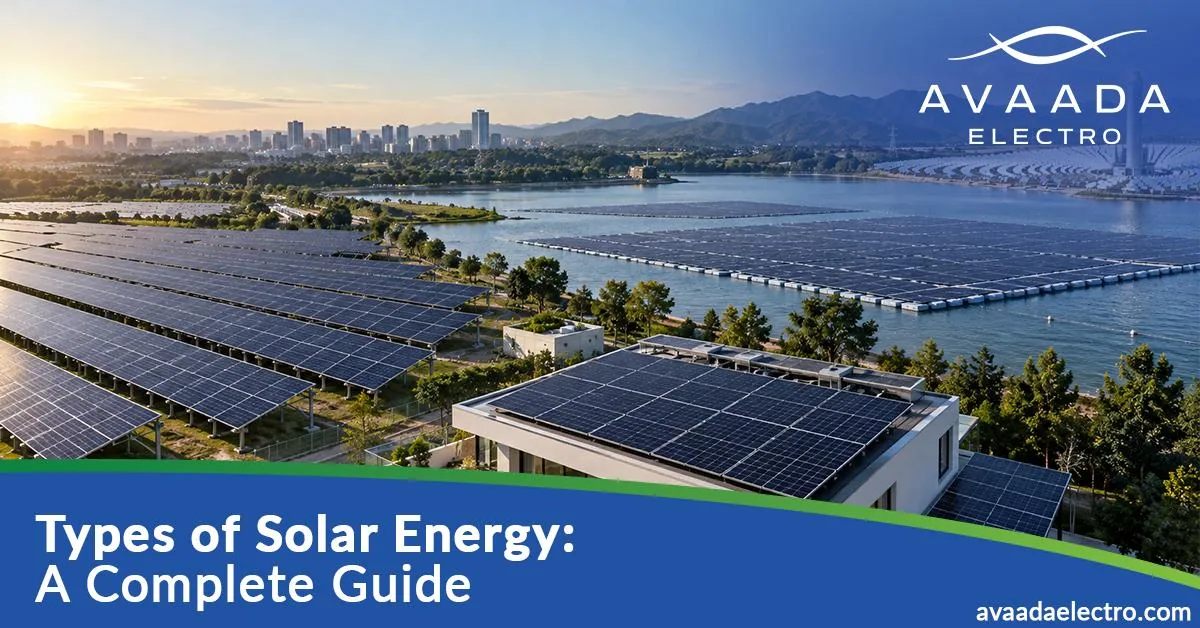
Types of PV Systems
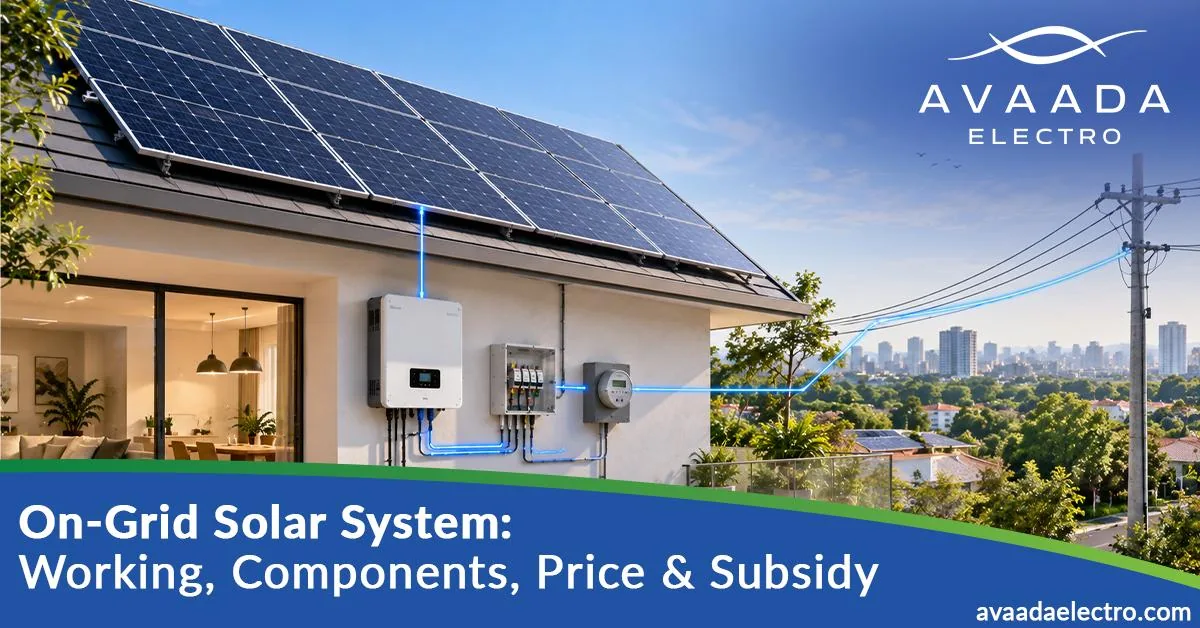
- On-grid PV systems are the most commonly found solar PV installation systems. They are connected to the public electricity grid. They do not need batteries.
- Off-grid PV systems are not connected to the public electricity grid and are ideal for remote areas where public grids cannot be extended. These are completely independent of external power grids and require batteries.
- Hybrid PV systems are connected to the public electricity grid and have solar batteries that provide a backup energy supply.
Read More – Solar Panel Installation Cost
Key Components of PV Systems
The PV system that converts sunlight into electrical energy comprises various components.
1. Solar panels
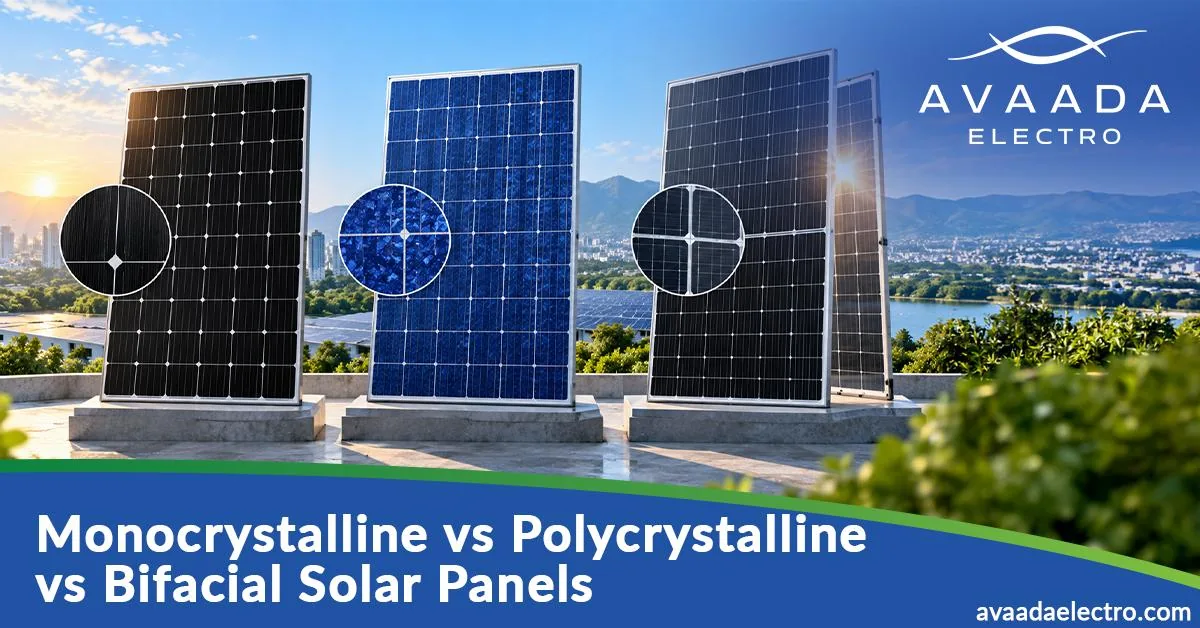
A PV system consists of one or more solar panels made of solar cells with semiconductor properties. These properties allowed them to capture sunlight and convert it into electricity. Based on cell composition and how they capture light, solar panels are of three types:
- Monocrystalline
Black coloured solar cells, made of a single silicon crystal, are highly efficient. - Polycrystalline
Blue coloured solar cells, made of multiple silicon crystals melted together, are less efficient
Captures sunlight on both front and rear surfaces.
It converts DC into AC. Usually, two types of inverters are used: - String inverters connected to a series of solar panels convert the entire DC output to AC output.
- Micro inverters are connected to each panel individually and convert the DC of each panel.
2. Mounting structure
It fixes the solar panel installation to the ground or rooftop. It is usually constructed from steel or aluminium. It should be robust and able to withstand adverse conditions.
3. Battery system
It stores the energy generated to be used at night or on cloudy days.
4. Charge control
It controls the flow of electricity, prevents overcharging of the battery, and extends the battery life.
5. Wiring, connectors, and monitoring equipment
These transport the electrical energy between each component and must be adequately sized to carry the current.
6. Monitoring system
Essential for tracking the overall performance of the PV system.
Step-by-Step Solar Panel Installation Process (Detailed)
Step 1: Mounting Structure Installation (2-3 Hours)
Why This Step Matters:
The mounting structure is the foundation. Poor installation here causes 80% of system failures and warranty issues.
Installation Process:
- Mark drill points on roof (using roof plans prepared in Step 0)
- Drill holes with concrete bits (for RCC roofs) or use clamps (for metal roofs)
- Install L-brackets/mounting feet with M12 bolts and expansion anchors
- Mounting height: 10-15 cm above roof surface (allows airflow = 5-10% better efficiency)
- Tilt angle installation:
- North India (Delhi): 30-35° angle
- Central India (Mumbai): 18-20° angle
- South India (Bangalore): 12-15° angle
- Verify with spirit level – tolerance: ±2°
Safety Checkpoint:
- Use harness if roof height >15 ft
- Ensure all bolts torqued to 80-100 Nm
- Test: Pull structure – should not move at all
Tools Needed:
Concrete drill, socket wrench, spirit level, measuring tape
Estimated Time: 2-3 hours for 5 kW system
Cost: ₹8,000-12,000 (for 5 kW)
Avaada Product Integration:
“Use high-grade aluminum mounting structures that withstand wind speeds up to 200 km/h (critical for coastal areas and monsoon regions)”
Step 2: Solar Panel Installation on Mounting (3-4 Hours)
Why Order Matters:
Install panels after mounting structure is rock-solid. Panels add 150-200 kg weight.
Installation Process:
- Unpack panels carefully – check for transit damage
- Mount modules in portrait orientation (taller than wide) = more stable
- Use clamps provided with mounting structure
- Panel spacing: 5-10 cm between panels (for wind circulation + cleaning)
- Connection pattern:
- Series connection: Increases voltage (better for string inverters)
- Parallel connection: Increases current (better for micro-inverters)
- String configuration example (for 5 kW system):
- 10 panels × 500W = 5 kW
- String 1: 5 panels (2.5 kW) → Inverter Input A
- String 2: 5 panels (2.5 kW) → Inverter Input B
Safety Checkpoint:
- Double-check all clamps are tight
- Verify panel orientation is 100% uniform
- Test open-circuit voltage (Voc) using multimeter – should match panel specs
Panel Type Selection (Avaada TOPCon vs Competitors):
- Mono-PERC: 16-17% efficiency, ₹26,000-28,000/kW
- N-Type TOPCon: 18-19% efficiency, ₹30,000-35,000/kW (Avaada Enlume G12)
- Bifacial: 18-20% efficiency, ₹32,000-38,000/kW
Estimated Time: 3-4 hours for 5 kW (10 panels)
Cost: ₹1,50,000-2,00,000 (for 5 kW system)
Step 3: DC Wiring & String Configuration (2-3 Hours)
Why This Matters:
Incorrect wiring causes:
- System shutdowns (50% efficiency loss)
- Fire hazards (wrong polarity)
- Warranty void
Detailed Process:
1. DC Cable Installation:
- Use only 6mm² copper DC cables (for 5 kW system)
Cable sizing formula:
(System Current A × Cable Length m × 2) ÷ (Allowable Voltage Drop V × 1000) = Minimum CSA
For 5 kW, 25m run:
(13A × 25 × 2) ÷ (1V × 1000) = 0.65 mm²
Use 6 mm² for safety.
2. String Configuration Wiring:
- Positive wire: Red MC4 connectors
- Negative wire: Black MC4 connectors
- Polarity check using multimeter before connections
3. String Junction Box Installation:
- Combines two strings into DC combiner box
- Installs string-level DC breakers (10A, 16A, or 20A depending on configuration)
- Fuse: Always use 1.25× string current rating
4. Surge Protection:
- DC surge protection device (SPD) mandatory
- Protects against lightning strikes (critical for Delhi, Mumbai monsoon regions)
- Lightning risk areas: Install within 2m of combiner box
Regional Considerations:
- Coastal areas (Mumbai, Chennai): Use marine-grade cable sheaths – corrosion prevention
- High altitude (Himachal, Uttarakhand): Lower oxygen pressure = cooler panels = 2% efficiency gain
- Extreme heat areas (Rajasthan, Telangana): White cable sheaths reduce heat absorption by 15°C
Estimated Time: 2-3 hours
Cost: ₹5,000-8,000 (cables, connectors, breakers, SPD)
Step 4: Inverter Installation & Setup (2-3 Hours)
Why Location Matters:
Inverter placement determines efficiency and lifespan.
Location Requirements:
- Install on north-facing wall (away from direct sun)
- Indoor, shaded location preferred
- Away from moisture, dust, and extreme temperatures
- Ambient temperature range: 0°C to 50°C (ideal: 20-30°C)
- Do NOT install on roof (temperature >60°C reduces efficiency by 15%)
Installation Steps:
- Wall mounting: Mount inverter 4-6 feet from ground (allows cable connections)
- DC input connections:
- Positive and negative from DC combiner box to inverter
- Use correct cable gauges
- Polarity verification mandatory
- AC output connections:
- Inverter output to AC breaker (10-16A)
- AC breaker to main distribution board (DB)
- Earthing/grounding mandatory (earthing rod 8-10 ft deep in soil)
- Net meter installation (for grid-connected systems):
- Position between inverter output and main DB
- Measures excess energy export to grid
- Bidirectional metering in approved states (Delhi, Mumbai, Bangalore, Hyderabad)
Types of Inverters for Indian Climate
String Inverter (Most Common):
- Best for: 3-10 kW systems, 2-3 strings
- Efficiency: 97-98%
- Cost: ₹18,000-30,000 for 5 kW
- Advantage: Single failure point monitored (easier troubleshooting)
- Disadvantage: One failed string affects entire system output
Micro Inverter (Growing Popularity):
- Best for: Shade-heavy roofs, complex layouts
- Efficiency: 96-97%
- Cost: ₹30,000-40,000 for 5 kW (add per-panel cost)
- Advantage: Panel-level monitoring, no string-level failure
- Disadvantage: Higher cost, more complex wiring
Hybrid Inverter (Future-Proof):
- Best for: Battery backup + grid-connected
- Efficiency: 95-97%
- Cost: ₹45,000-60,000 for 5 kW (if battery-ready)
- Advantage: Can add battery later without replacement
- Disadvantage: Higher upfront cost
Avaada’s Recommended Setup for 5 kW:
- Avaada Enlume G12 500W panels × 10 = 5 kW
- String inverter (Sungrow or ABB) = ₹25,000
- Total DC + Inverter + Wiring: ₹2,50,000-2,70,000
Estimated Time: 2-3 hours (including earthing)
Cost: ₹20,000-35,000
Step 5: AC Wiring & Main Distribution Board Connection (1-2 Hours)
Critical Safety Step – Requires Certified Electrician
- AC cable sizing:
- 5 kW system output: 5000W ÷ 230V = 21.7A
- Use 6mm² copper cable for 25m run (allows 3% voltage drop)
- AC breaker installation:
- Breaker rating: 1.25 × system current
- For 5 kW (21.7A): Use 25A or 32A AC breaker
- Type: MCB (Miniature Circuit Breaker) with 30mA RCD (Residual Current Device)
- Earth leakage protection:
- RCD sensitivity: 30mA max (safety standard)
- Tests earth fault instantly – system trips within milliseconds
- Main DB connection:
- Connect AC breaker to main supply panel
- Earth the system: Earthing rod (8-10 ft in soil, <5Ω resistance)
- Install generation meter at DB for monitoring
Estimated Time: 1-2 hours
Cost: ₹3,000-5,000 (breaker, cables, connectors)
Step 6: Battery Installation (Optional - For Hybrid/Off-Grid Systems)
When Required:
- Hybrid systems: Need battery for peak hour support + backup
- Off-grid systems: Mandatory
- Budget: ₹40,000-1,50,000 depending on capacity
Battery Types for Indian Market:
Lead-Acid Tubular:
- Capacity: 50-200 Ah (5-20 kWh)
- Cost: ₹40,000-80,000
- Lifespan: 5-7 years
- Best for: Budget-conscious, predictable usage
Lithium-Iron Phosphate (LiFePO4):
- Capacity: 5-15 kWh
- Cost: ₹60,000-1,50,000
- Lifespan: 10-15 years
- Best for: Long-term investment, high DoD (Depth of Discharge)
- Advantage: 2-3x longer life, 50% better efficiency
Installation:
- Install battery in ventilated enclosure (not in bedrooms due to off-gassing)
- Connect battery + and – terminals to charge controller
- Charge controller to inverter connection
- Battery monitoring: SOC (State of Charge) display mandatory
Estimated Time: 2-3 hours
Cost: ₹40,000-1,50,000 (battery only)
Step 7: Grounding & Surge Protection (1 Hour - Critical)
Lightning Protection Setup:
Especially critical for:
- Mumbai (monsoon, high lightning risk)
- Coastal areas (Chennai, Kochi)
- High-altitude areas (Himachal)
Installation:
- Earthing rod:
- Drive 8-10 ft deep into soil
- Earthing resistance test:
- Megger test <5Ω (mandatory)
- Surge Protection Devices (SPD):
- DC SPD at combiner box
- AC SPD at main AC breaker
- Protects all equipment from voltage spikes
- Bonding (Electrical connection):
- All metal parts (mounting structure, panel frames) → Earthing rod
- Prevents accumulation of static charge
Cost: ₹2,000-4,000
Step 8: System Commissioning & Testing (4-6 Hours)
Mandatory Tests Before Handover:
Electrical Tests:
- Insulation Resistance Test (Megger Test):
- DC side: ≥1 MΩ
- AC side: ≥1 MΩ
- If fails: Risk of electrocution – system cannot operate
- Continuity Check:
- All earths, neutrals connected properly
- Using multimeter continuity mode
- Load Test:
- Run system at 50%, 75%, 100% load
- Monitor voltage, frequency (50 Hz), current
- System should handle all loads without tripping
- Voltage Check:
- DC voltage from panels:
- Should match (Voc × Number of panels in series)
- AC voltage:
- 220-230V ± 10%
- DC voltage from panels:
Performance Verification:
- Panel Voltage & Current Measurements:
At different times:
- 9 AM: 60% max power
- 12 PM: 90-100% max power
- 3 PM: 85% max power
- 6 PM: 20-30% max power
- Inverter Efficiency Test:
- DC input power vs AC output power
- Efficiency should be ≥95%
- Net Meter Test (Grid-Connected):
- Meter reading upward (energy export) when sun is strong
- Meter reading backward when consuming from grid
- Monitoring App Test:
- Real-time data visible on mobile app
- Historical data logging working
- Alert system functional
Safety Final Checks:
- All wiring color-coded correctly (Red=positive, Black=negative, Green=earth)
- All clamps and connectors tight
- No visible damage or water ingress
- All equipment labels/nameplates visible
- Fire extinguisher available (dry powder type)
- Emergency shutdown procedures explained to homeowner
Estimated Time: 4-6 hours
Cost: ₹3,000-5,000 (testing equipment rental)
Step 9: Grid Connection Approval & Synchronization (5-10 Days)
State-Specific Process:
Delhi (BSES/Tata Power):
- Apply for grid connection (online portal: https://bses.in)
- BSES inspection team verifies installation
- Issue approval letter (3-5 days)
- Install grid synchronization relay (₹2,000-3,000)
- Net meter installation by BSES (free)
- Live date: Connection becomes active
Mumbai (BEST/MSEDCL):
- File application with technical drawings
- BEST structural audit (if capacity >10 kW)
- Safety inspection by MSEDCL
- Approval within 10-15 days
- Synchronization done by BEST engineers
Bangalore (BESCOM):
- Online application via BESCOM portal
- Virtual inspection for systems <10 kW
- Physical inspection for >10 kW systems
- Fastest approval: 5-7 days (BESCOM is known for quick approvals)
- No separate relay needed (built into string inverters)
What Happens During Synchronization:
- Grid frequency synchronization (50 Hz in India)
- Phase alignment check (your solar output matches grid phase)
- Voltage stability check
- System ready to export excess power
Estimated Time: 5-10 days
Cost: ₹2,000-5,000 (relay, relay box, installation)
Step 10: Final Commissioning & Handover Documentation (1-2 Hours)
Documentation Required:
1. Technical Report:
- System design and specifications
- Installation photographs (10-15 photos)
- Electrical test reports
- Performance test results
- Component warranty cards
2. Approvals & Permits:
- Building permission approval
- DISCOM/BESCOM/BSES grid connection approval
- Net meter installation certificate
- Safety inspection certificate
3. Warranties & Support:
- Panel warranty: 25-30 years (linear performance guarantee)
- Inverter warranty: 10 years
- Mounting structure warranty: 10 years
- O&M support plan (optional: ₹5,000-10,000/year)
4. User Training:
- How to monitor system on mobile app
- What to do in case of alerts
- Preventive maintenance schedule
- When to call technician vs simple troubleshooting
5. Maintenance Schedule:
- Quarterly cleaning (with soft brush + water)
- Annual inverter maintenance
- 25-year service roadmap
Total Installation Timeline:
- Planning & approvals: 15-30 days
- Physical installation: 1-2 days
- Testing & commissioning: 1 day
- Grid connection: 5-10 days
Total: 25-45 days from start to live
Estimated Time for Handover: 1-2 hours
Cost: ₹0 (included in installation)
Government of India’s Support For Solar Installations
The government of India has launched several schemes to boost solar production and utilisation. These government schemes have optimised the solar installation cost in India. For example
PM Surya Ghar Muft Bijli Yojana provides subsidies for rooftop solar installation and has catalysed residential solar adoption.
The Production Linked Incentive scheme promotes the production of high-quality and efficient solar PV modules. Besides these central government schemes, several state subsidies and initiatives, like net metering, which enables customers to supply excess solar energy back to the grid and offset their bills, have significantly increased Solar energy adoption in India in 2026.
Solar energy finds use in several activities such as:
- Solar water heaters can be used to heat water in homes.
- Solar energy can be used for domestic electricity generation.
- It can also be used for cooking purposes.
- Solar system installation can power small businesses and even industries. Solar panels are installed in power lights, electrical appliances, and heavy machinery industries.
- Solar energy can be widely used in agriculture and farm practices. For example, solar pumps can pump water from the ground, reducing the use of diesel-run pumps.
Cost Comparison: Avaada vs Competitors
Metric | Avaada Electro | Waaree | Tata Power |
Panel Efficiency (TOPCon) | 18-19% | 17-18% | 17.5% |
Cost per Watt (₹) | ₹26-30 | ₹25-28 | ₹28-32 |
Warranty | 25 years | 25 years | 25 years |
Local Service Network | Excellent (India) | Good | Excellent (Pan-India) |
5 kW Total System Cost | ₹2,80,000-3,20,000 | ₹2,70,000-3,10,000 | ₹3,00,000-3,40,000 |
Read More – Best Solar Panels For Home Use
Common Mistakes To Avoid
Solar system installation is a long-term investment, so you should look out for some mistakes to avoid.
- Incorrect system sizing
Before finalizing the system size, it is essential to research energy usage and solar panel capacity. Oversizing could lead to unnecessary costs, and undersizing could result in inadequate energy output. - Poor quality components
Substandard components like batteries can damage the entire system. So, make sure to go after certified manufacturers only. - Not paying attention to shading and orientation
Solar panels are sun light-dependent. If a large part of the system is shaded, output can drop significantly. So it should be placed correctly. - Ignoring the compliance documents
Be it residences or businesses, specific guidelines and permissions are needed for solar installation. Skipping this can lead to fines and legal actions. - Skipping professional inspections
DIY installation of solar panels can prove fatal in the long run. A professional knows all the technicalities of handling PV panel installation, making professional inspection non-negotiable to ensure your solar investment’s safety and long-term protection.
Solar Panel Maintenance and Monitoring
The solar installation cost in India has been decreasing due to technological advancements. However, proper maintenance of solar panels can vastly increase energy production. Here’s what to do:
- Regular cleaning of panels for optimal output
Clean solar panels at least twice yearly to keep them in good condition. If the rooftop solar installation is in a congested area with high pollution, clean it more often.
Clean water, mild detergents, and soft bristle brushes will do most of the cleaning. - Periodic inspection of cables, inverter, and mounting hardware
Visual inspections from time to time can help you detect possible damage early on. You can also call professionals for the inspections. - Using real-time monitoring apps or platforms
Modern solar systems include digital monitoring tools that provide real-time performance data. You can track how much electricity is produced, consumed, and fed back into the grid with a click.
An important point is that even if your solar system appears to run smoothly, you can not detect all issues yourself. So, book a trained technician who can nip the evil in the bud, so minor problems do not escalate.
Frequently Asked Questions
Can I install solar panels myself?
While technically possible, DIY installation for rooftop systems is not recommended. Professional installation ensures correct wiring, proper angle positioning, and safety compliance. Incorrect installation voids manufacturer warranties and disqualifies you from PM Surya Ghar subsidies. Licensed technicians validate structural integrity before commissioning.
How long do solar panels last?
Quality solar panels last 25–30 years with proper maintenance. Most retain 80% efficiency after 25 years. Regular cleaning twice yearly and professional inspections every 2–3 years extend system longevity. Avaada’s high-efficiency modules maintain consistent output throughout their operational lifespan with minimal degradation.
Do I need a battery for solar?
Batteries are optional but recommended for off-grid and hybrid systems. With on-grid systems and net metering enabled, excess daytime solar energy feeds to the grid, offsetting nighttime consumption. Batteries provide backup during power outages and enable energy independence without grid reliance in off-grid installations.
How much electricity can I generate with a 3kW system?
A 3kW system generates 12–15 units daily under optimal conditions. Output varies with season, weather, and roof orientation. In India’s high-solar regions, annual generation averages 4,500–5,000 units, enabling 80–100% electricity bill reduction when paired with net metering.
Is net metering available in my state?
Net metering is available in Delhi, Maharashtra, Tamil Nadu, Karnataka, Gujarat, Rajasthan, Haryana, and Telangana. Contact your local distribution company (DISCOM) for specific policies. Net metering allows you to export excess solar energy to the grid and earn credits, maximizing residential system cost-effectiveness.
How long does the entire solar installation process take?
A professional rooftop installation for a 3kW residential system takes 6–8 hours. Site assessment and regulatory approvals require 2–4 weeks beforehand. Including paperwork, net metering setup, and grid connection, full commissioning typically spans 4–6 weeks from initial approval to system operation and first energy generation.
What is Rule 120 for solar systems, and why does it matter?
Rule 120 limits your solar system size to 120% of average monthly electricity consumption, preventing grid overload. For households consuming 300 units monthly, maximum system capacity is 3.6kW. Oversizing beyond this violates grid safety standards and disqualifies you from net metering eligibility and government subsidy programs.
Can I run an air conditioner on a solar system?
Yes, solar systems can power ACs if properly sized. A 1–1.5 ton AC requires 1.5–2kW during operation. A 3kW system runs one AC unit plus basic appliances during peak sun hours (9 AM–4 PM). For all-day AC usage, add battery backup or hybrid system configuration with grid support for uninterrupted cooling.
What permits and approvals do I need before installation?
You require approval from your local electricity distribution company (DISCOM) for grid connection. Residential installations need municipal NOC and building bylaw compliance. PM Surya Ghar applicants must obtain net metering approval before installation. Processing takes 1–2 weeks; bypassing permits risks fines and subsidy forfeiture.
What's the cost breakdown for a 3kW solar system in India?
A 3kW system costs ₹1,50,000–₹2,00,000 pre-subsidy: solar panels (₹75,000–₹90,000), inverter (₹40,000–₹60,000), mounting (₹15,000–₹25,000), wiring/labor (₹20,000–₹30,000). PM Surya Ghar subsidy covers 40% of additional costs above 2kW, reducing final investment by ₹60,000–₹78,000 with 4–7 year ROI.
How do I choose between monocrystalline, polycrystalline, and bifacial panels?
Monocrystalline panels deliver 19–22% efficiency, ideal for space-limited roofs and low-light performance. Polycrystalline panels offer 16–18% efficiency at cost of fitting solar panels. Bifacial panels capture reflected sunlight for 20–25% additional power. Avaada’s N-Type TOPCon modules achieve 23%+ efficiency for maximum long-term generation and minimal degradation.
What's the difference between on-grid, off-grid, and hybrid solar systems?
On-grid systems connect to DISCOM, enabling excess energy export via net metering; ideal for stable electricity areas. Off-grid systems operate independently with battery storage for remote locations. Hybrid systems combine both—batteries provide backup while remaining grid-connected, offering uninterrupted power with savings flexibility and full subsidy eligibility.
How often should I clean solar panels, and what's the best method?
Clean panels every 2–3 months, more frequently in high-pollution areas. Use soft-bristle brushes, demineralized water, and mild detergent—avoid harsh chemicals or pressure washing. Regular cleaning maintains 95%+ efficiency; dirty panels lose 15–25% output. Schedule annual professional inspections to detect cable degradation, inverter faults, and mounting corrosion early.
How do I know if my roof is suitable for solar panel installation?
Your roof must be structurally sound and south-facing for optimal sunlight. Assess shading from trees, buildings, or chimneys—even 20% shade reduces output 40%. Roof angle should align with latitude (Delhi: 28–32°); mounting allows tilt adjustment. Professional load assessment and shading analysis before installation ensure safety and maximum energy generation.
What happens to my solar system during the monsoon season?
Cloud cover reduces output 40–60% compared to summer months. On-grid systems automatically draw deficit power from DISCOM; hybrid/off-grid systems rely on batteries. Monsoons still generate 10–12 units on 3kW systems in India. Net metering ensures summer surplus credits offset monsoon shortfalls, maintaining annual cost-effectiveness throughout seasonal variation.